
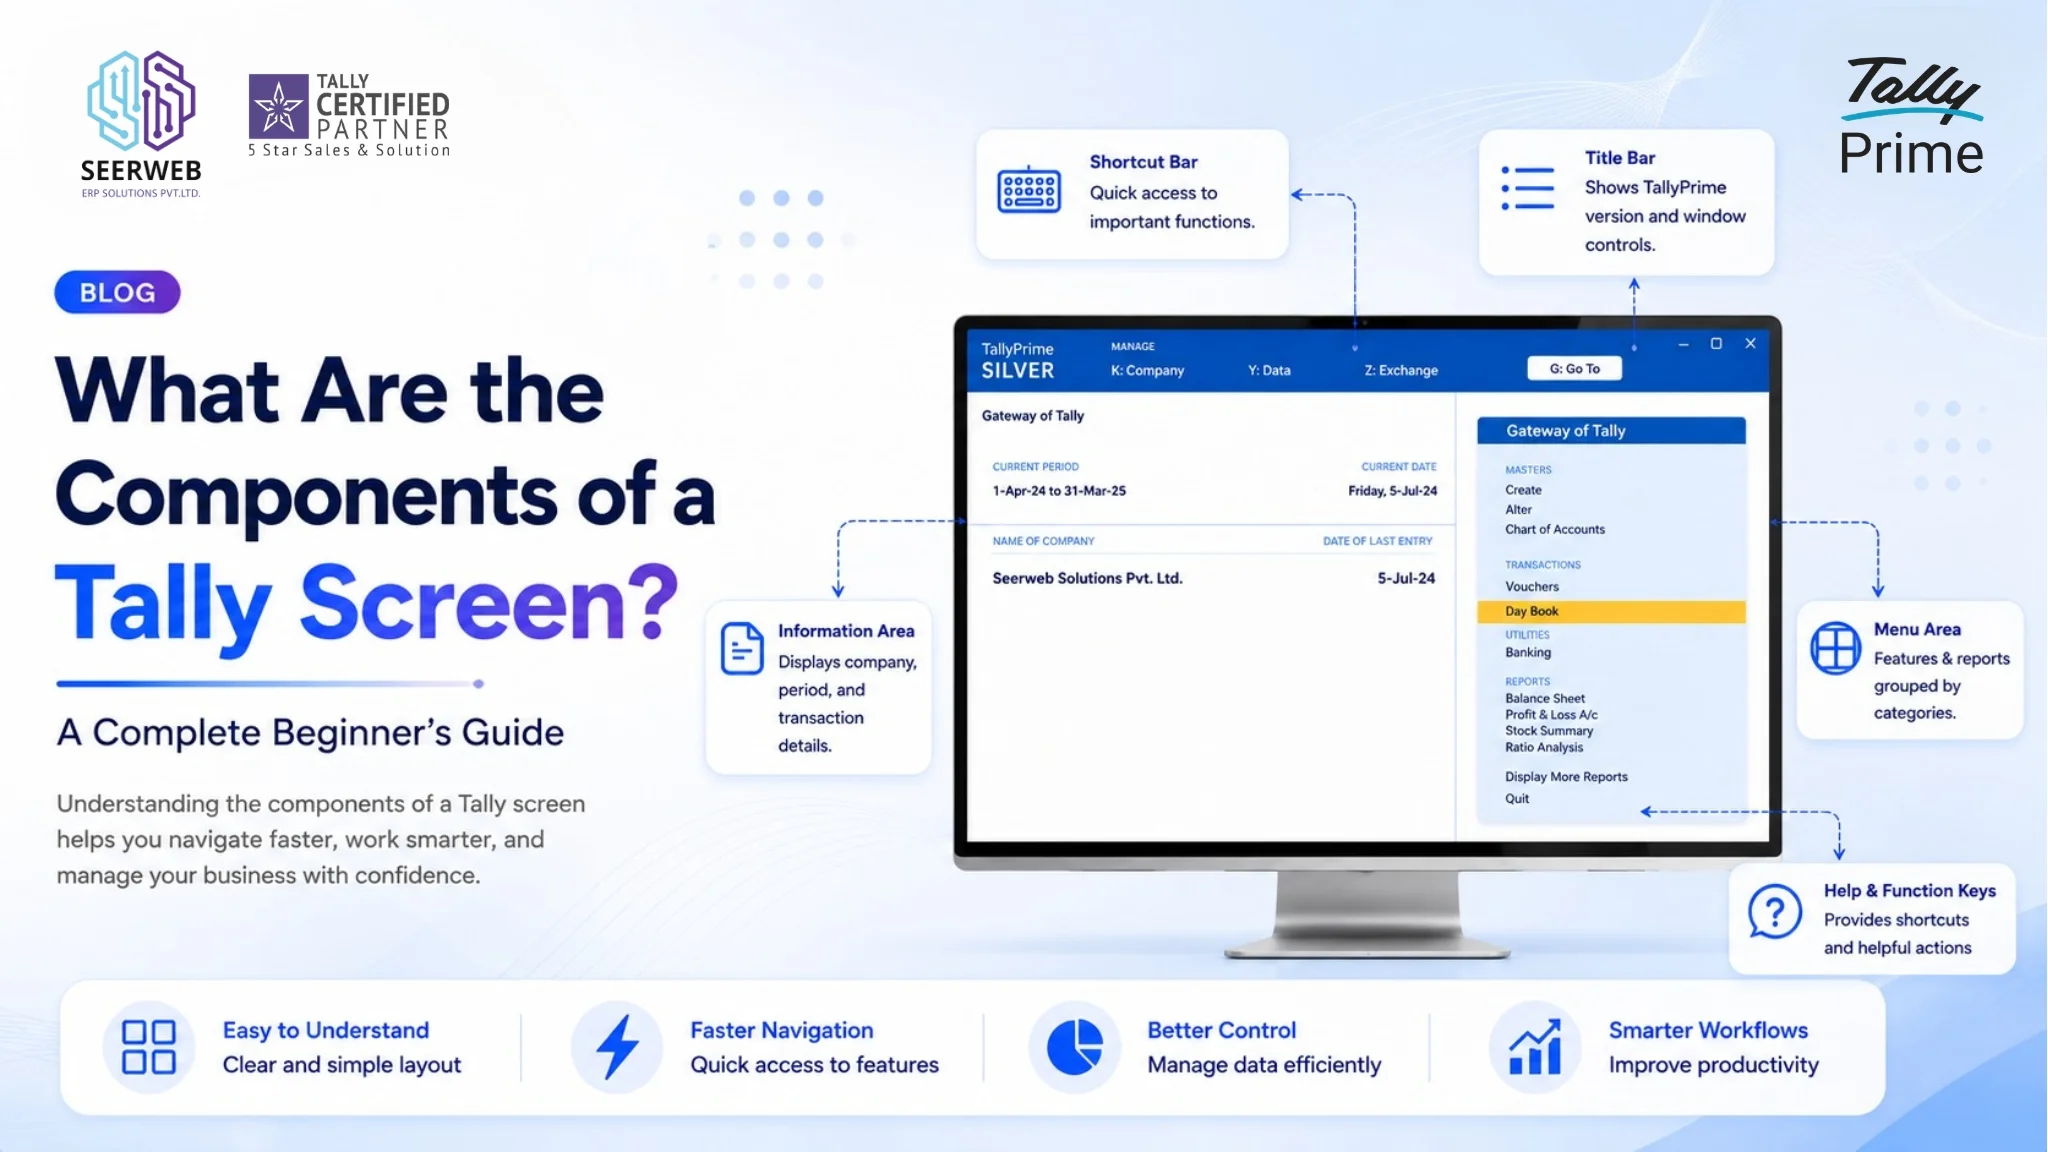
When you open TallyPrime for the first time, the interface can seem overwhelming. There are menus, panels, shortcuts, and information displayed across different sections of the screen, making it difficult for beginners to know where to start. However, once you understand the Tally screen components, the software becomes much easier to navigate.
Every section of the Tally screen has a specific purpose. Some areas help you switch between companies, while others provide quick access to vouchers, reports, settings, or calculations. Knowing what each component does not only improves your efficiency but also reduces mistakes during accounting and inventory management.
In this guide, we’ll explain every major component of the TallyPrime interface, where it’s located, what it does, and why it’s important. Whether you’re a student, accountant, or business owner, this guide will help you navigate TallyPrime with confidence.
Tally Prime Interface at a Glance
The TallyPrime interface is designed to simplify accounting tasks by organizing different functions into clearly defined sections. Each component plays a unique role in helping users manage accounting, inventory, taxation, payroll, and reporting.
The major Tally screen components include:
- Title Bar
- Gateway of Tally (Main Menu)
- Menu Bar
- Button Bar (Right-Hand Toolbar)
- Calculator Panel
- Company Info Panel
- Status Bar
- Work Area
Together, these sections create a structured workspace where users can perform daily accounting operations efficiently. Understanding each of them will make navigation faster and reduce the learning curve for beginners.
1. Title Bar
The Title Bar is located at the very top of the TallyPrime window. It displays important information such as the software name, the installed version of TallyPrime, and the currently active company.
This information becomes especially useful when troubleshooting software issues or confirming that you’re working on the correct company file. If you’re contacting technical support or following online tutorials, checking the version number in the title bar ensures you’re using the same version being discussed.
Although it’s one of the smallest Tally screen components, it provides essential information every user should be familiar with.
2. Gateway of Tally (Main Menu)
The Gateway of Tally is the heart of the TallyPrime interface. After selecting or opening a company, this is the first screen you see. It acts as the central navigation hub from which nearly every accounting activity begins.
From the Gateway of Tally, users can access:
- Masters (Ledgers, Groups, Stock Items, Cost Centres, etc.)
- Transactions (Accounting, Inventory, Payroll Vouchers)
- Reports (Balance Sheet, Profit & Loss, Stock Summary, GST Reports)
- Utilities and administrative functions
- Banking features
- Data management tools
Rather than searching through multiple menus, the Gateway organizes tasks into logical categories, allowing users to move directly to the required function.
For beginners, understanding the Gateway of Tally is one of the most important steps in learning TallyPrime because almost every workflow starts here.
3. Menu Bar (Top Navigation)
The Menu Bar appears near the top of the screen and provides quick access to commonly used sections without returning to the Gateway every time.
Some of the primary options include:
- Company – Create, alter, select, or shut companies.
- Masters – Manage ledgers, stock items, groups, and other master data.
- Vouchers – Record accounting, inventory, payroll, and other transactions.
- Reports – View financial statements, GST reports, inventory reports, and business insights.
- Help – Access support resources, shortcuts, product information, and documentation.
Although it may seem similar to the Gateway of Tally, the Menu Bar serves a different purpose. While the Gateway is the main dashboard for navigating the software, the Menu Bar provides quick navigation shortcuts that help experienced users switch between modules without disrupting their workflow.
4. Button Bar (Right-Hand Toolbar)
The Button Bar, located on the right side of the screen, is one of the most frequently used Tally screen components. It contains context-sensitive shortcuts, meaning the available buttons change depending on the screen you’re currently using.
Some commonly used function keys include:
- F1 – Select or change the company.
- F2 – Change the current working date.
- F3 – Open the Company menu or switch between companies.
- F11 – Configure company features such as accounting, inventory, taxation, payroll, and banking.
- F12 – Modify screen-level configuration and display settings.
The Button Bar also displays additional shortcuts relevant to the current task. For example, when entering vouchers, you’ll see options related to voucher types, printing, or duplication. When viewing reports, different report-specific actions become available.
Learning these shortcut keys significantly speeds up daily operations. Instead of navigating multiple menus, users can access frequently used functions with just a single key press, making data entry faster and improving overall productivity.
5. Calculator Panel
At the bottom of the TallyPrime screen is the Calculator Panel, a built-in calculator that allows users to perform calculations without leaving the software.
This feature is particularly useful during accounting entries. For example, while recording a purchase invoice, you may need to verify:
- GST calculations
- Discount percentages
- Freight allocations
- Quantity-based calculations
- Final invoice totals
Instead of switching to an external calculator, you can perform these calculations directly within TallyPrime. This saves time and minimizes interruptions during data entry.
For businesses that process numerous invoices daily, the Calculator Panel becomes an essential productivity tool.
6. Company Info Panel
The Company Info Panel displays details about the company currently open in TallyPrime.
It typically shows information such as:
- Company name
- Active financial year
- Books beginning date
- Company data currently loaded
This becomes particularly valuable for accountants and firms managing multiple businesses. Before entering transactions, users can quickly confirm that they are working in the correct company and financial year.
Entering vouchers in the wrong company or financial period can create significant accounting issues, making this panel an important checkpoint before recording transactions.
7. Status Bar / Information Panel
The Status Bar appears near the bottom of the screen and provides helpful system information while you work.
It displays details such as:
- Current working date
- Active settings
- System notifications
- Informational alerts
These indicators help users stay aware of their current working environment. For instance, if the accounting date differs from today’s date, the Status Bar immediately reflects that information, reducing the chances of posting entries in the wrong period.
Though often overlooked, it helps users maintain accuracy throughout the accounting process.
8. Work Area (Main Screen)
The Work Area occupies the largest portion of the TallyPrime interface. This is where the actual work happens.
Depending on what you select, the Work Area dynamically changes to display:
- Voucher entry screens
- Ledger creation forms
- Inventory management pages
- Financial reports
- GST returns
- Stock summaries
- Payroll information
Unlike other Tally screen components, which remain relatively fixed, the Work Area constantly changes based on the task you’re performing. Whether you’re creating a ledger, entering a sales voucher, or reviewing financial statements, this section adapts accordingly.
Since users spend most of their time here, becoming comfortable with the Work Area is essential for efficient use of TallyPrime.
Why Understanding Screen Components Matters
Learning the Tally screen components is about more than simply identifying different parts of the interface—it directly improves your efficiency and accuracy. When users know where every function is located, they can enter vouchers more quickly, generate reports with fewer clicks, and reduce navigation errors. This familiarity also makes it easier to use shortcut keys and context-sensitive options, leading to a smoother workflow.
For businesses upgrading from Tally ERP 9, understanding the TallyPrime layout helps simplify the transition. Although the interface has been modernized, the core accounting functions remain the same. Becoming comfortable with the new screen components allows experienced users to adapt more quickly while helping beginners build a solid foundation from the start.
Frequently Asked Questions
1. What is the Gateway of Tally?
The Gateway of Tally is the main dashboard of TallyPrime. It serves as the central navigation hub, providing access to masters, vouchers, reports, utilities, and other key features after opening a company.
2. What is the use of the Button Bar in Tally?
The Button Bar provides context-sensitive shortcuts that change according to the current screen. It includes frequently used function keys such as F1, F2, F3, F11, and F12, helping users perform tasks more efficiently.
3. Where can I see current company details in Tally?
Current company details are displayed in the Company Info Panel and the Title Bar. These sections show information such as the active company name, financial year, books beginning date, and software version.
4. Can I customize the Tally screen layout?
Yes. TallyPrime allows users to customize several aspects of the interface through configuration settings, display preferences, and feature settings using options like F12 and F11. While the overall layout remains consistent, many display and functionality settings can be adjusted to suit business requirements.
Conclusion
Although the TallyPrime interface may initially appear complex, each section is designed to make accounting faster and more organized. From the Gateway of Tally and Button Bar to the Calculator Panel, Status Bar, and Work Area, every component contributes to a smooth and efficient workflow. Understanding these Tally screen components helps users navigate confidently, minimize errors, and complete accounting tasks more efficiently. Once you’re familiar with the interface, you’ll find it much easier to record transactions, manage reports, and access business information.
If you’re continuing your TallyPrime learning journey, the next step is understanding the Types of Vouchers in Tally Prime, where you’ll learn how different vouchers are used to record business transactions accurately.